Topic forest ecosystem drawing: Discover the beauty and complexity of forest ecosystems through drawing, a journey that enhances your appreciation and understanding of nature"s intricate designs.
Table of Content
- How to create a drawing of a forest ecosystem?
- Introduction to Forest Ecosystems and Their Importance
- Key Components of a Forest Ecosystem
- Step-by-Step Guide on How to Draw Different Types of Forests
- Incorporating Biodiversity in Your Forest Drawings
- Illustrating the Layers of a Forest Ecosystem
- Techniques for Depicting Light and Shadow in Forest Scenes
- YOUTUBE: How to draw forest scene step by step - Art video
- Adding Wildlife to Your Forest Ecosystem Drawings
- Environmental Messages through Art: Highlighting Conservation
- Materials and Tools for Drawing Forest Ecosystems
- Sharing Your Artwork: Platforms and Communities
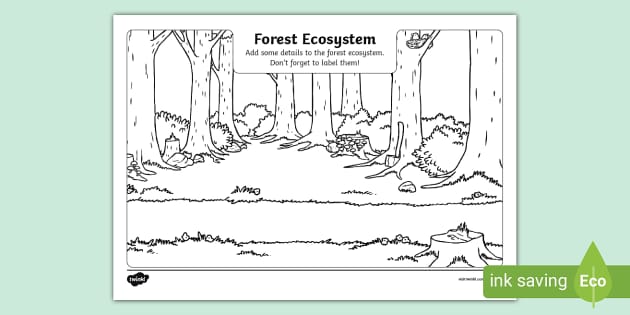
How to create a drawing of a forest ecosystem?
Creating a drawing of a forest ecosystem can be a fun and creative way to visually represent the balance and diversity of life in a forest. Here is a step-by-step guide on how to create a drawing of a forest ecosystem:
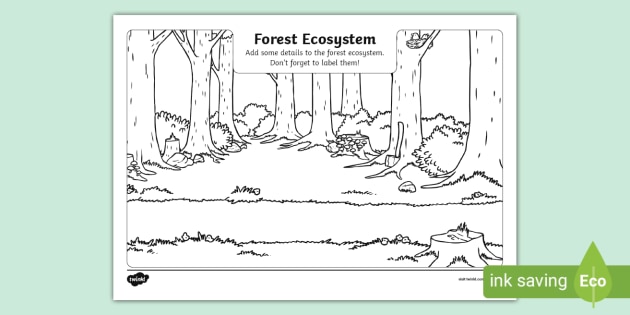
Start by sketching the outline of the forest on a blank piece of paper. You can include trees, bushes, and other vegetation that make up the forest.
Add details to the trees and vegetation by drawing their different shapes, sizes, and textures. Remember that forests have a variety of species, so you can add different types of trees such as oak, pine, or maple.
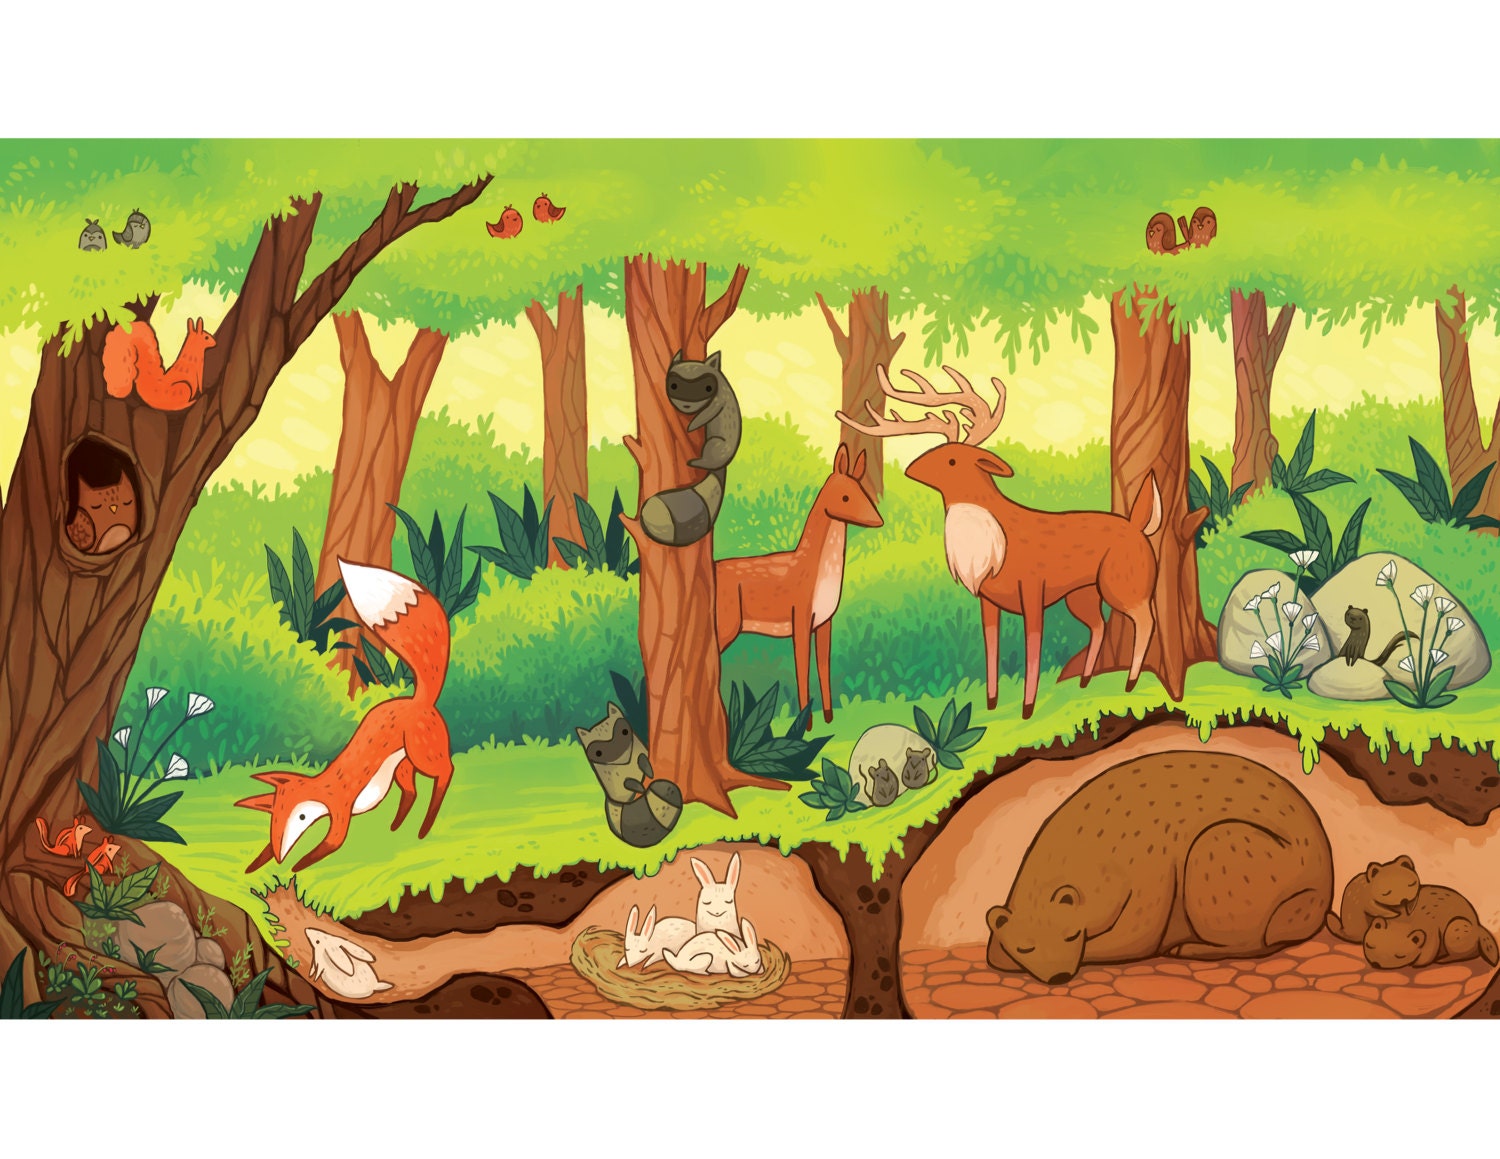
Next, draw the animals that live in the forest. This can include mammals like deer, bears, or wolves, as well as birds, insects, and reptiles. Consider the different layers of the forest, such as the forest floor, understory, and canopy, and place the animals accordingly.
Don\'t forget to add other elements like rocks, streams, or ponds to enhance the ecosystem. These features provide habitats for various organisms within the forest.
Once the basic elements are in place, add more details like leaves, flowers, and fruit to the trees and plants. This will add depth and complexity to your drawing.
Consider using different shading techniques to create depth and contrast in your drawing. You can use cross-hatching, stippling, or blending with pencils or colored pencils to add dimension to your forest ecosystem.
Finally, add any additional details or elements that you find fitting for your forest ecosystem. This can include fallen logs, fungi, or even rays of sunlight breaking through the canopy.
Remember, the key to creating a drawing of a forest ecosystem is to capture the diversity and interconnectedness of all living things within the forest. Have fun and let your creativity shine!
READ MORE:
Introduction to Forest Ecosystems and Their Importance
Forest ecosystems are dynamic and complex networks of plants, animals, and microorganisms interacting with their physical environment. They are crucial for the planet, providing essential services such as oxygen production, carbon sequestration, and biodiversity preservation. Forests also play a vital role in water cycle regulation, soil conservation, and climate moderation. Drawing attention to these ecosystems through art can help raise awareness of their beauty and the critical role they play in environmental sustainability.
- Biodiversity: Forests are home to over 80% of the world"s terrestrial biodiversity, making them a rich tapestry of life.
- Climate Regulation: By absorbing carbon dioxide, forests mitigate the effects of climate change.
- Water Cycle: They influence local and global water cycles, ensuring clean water supply and reducing the risk of natural disasters like floods and landslides.
- Human Well-being: Beyond environmental benefits, forests contribute to human health and well-being, offering recreational opportunities and resources for medicines.
Drawing forest ecosystems not only captures their enchanting beauty but also emphasizes the importance of preserving these vital natural resources for future generations. Through art, we can express the intricate details of forest life, from the towering trees to the diverse species that dwell within, promoting a deeper understanding and appreciation for our natural world.
Key Components of a Forest Ecosystem
Forest ecosystems are made up of critical components that interact with each other in a delicate balance. Understanding these elements is essential for appreciating the complexity and importance of forests.
- Flora (Trees and Understory Vegetation): The variety of trees, shrubs, ferns, and groundcover plants form the green infrastructure of the forest, providing habitat and food for fauna.
- Fauna (Animals and Insects): From large mammals to microscopic insects, fauna plays a role in pollination, seed dispersal, and the food web.
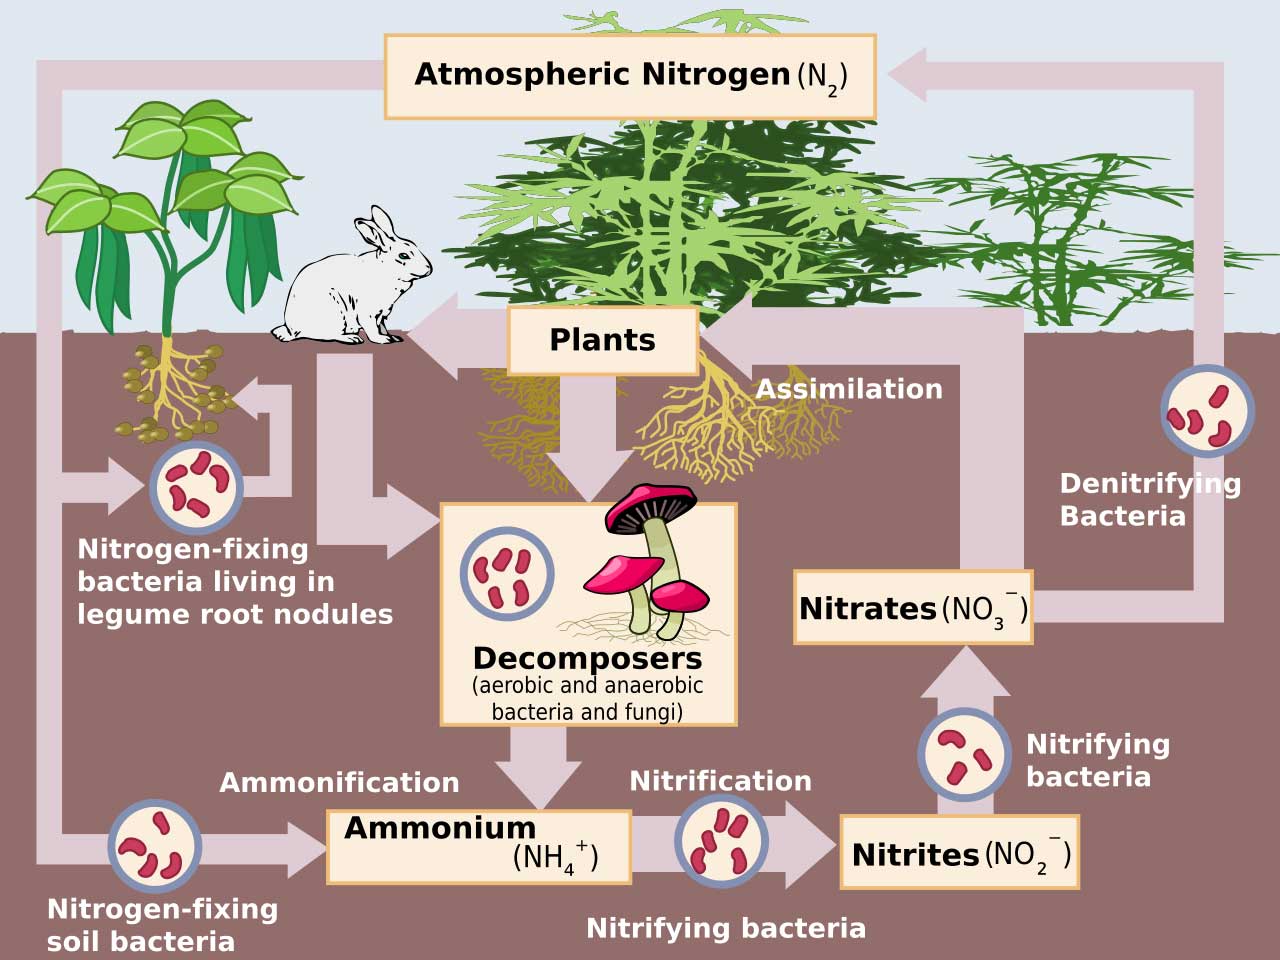
- Soil and Decomposers: Soil health is vital for a forest"s vitality, supported by decomposers like fungi and bacteria that recycle nutrients.
- Water (Rivers, Lakes, and Rainfall): Water sources and precipitation are crucial for maintaining the forest"s moisture balance and supporting life.
- Microclimates: Variations in temperature, humidity, and light within the forest create unique niches for different species.
Each component of a forest ecosystem plays a unique role in its functionality and sustainability. Through drawings and illustrations, we can explore these interactions and the beauty of forest ecosystems, fostering a deeper connection and commitment to their conservation.
Step-by-Step Guide on How to Draw Different Types of Forests
Drawing different types of forests can be a delightful way to explore and appreciate the diversity of ecosystems. Here’s a simple guide to help you get started:
- Decide on the Type of Forest: Begin by choosing the type of forest you want to draw, such as tropical rainforest, temperate forest, boreal forest, or deciduous forest.
- Sketch the Outline: Start with a light pencil sketch to outline the major elements like trees, shrubs, and the forest floor. Consider the forest density and layering of vegetation.
- Add Trees: Draw the dominant trees of your chosen forest type. For tropical forests, include tall trees with large leaves. For boreal forests, focus on coniferous trees.
- Detail the Understory: Add smaller trees, bushes, and ground cover. Show diversity through different shapes and sizes to make your forest come to life.
- Include Wildlife: Sketch in some wildlife that is characteristic of the forest type you are drawing. This could be birds, mammals, or insects.
- Texturize: Use different strokes to add texture to the trees, leaves, and ground. This adds depth and realism to your drawing.
- Shade and Highlight: Apply shading to create depth, indicating areas of light and shadow. Highlight areas where sunlight filters through the canopy.
- Final Touches: Review your drawing for any final adjustments. Add more details or adjust the composition to enhance the overall look of your forest ecosystem.
This guide offers a foundational approach to drawing forests, encouraging exploration of the vast beauty and complexity of forest ecosystems. With practice, you can capture the essence of these incredible natural environments on paper.
Incorporating Biodiversity in Your Forest Drawings
Biodiversity is the heart of forest ecosystems, showcasing a wide range of plant and animal species. To accurately represent this in your drawings, follow these steps:
- Research the Ecosystem: Begin with understanding the specific forest ecosystem you wish to draw. Identify the key species that inhabit it.
- Vary Plant Life: Include a variety of trees, shrubs, and underbrush to reflect the true diversity. Pay attention to the unique characteristics of each plant.
- Animal Inhabitants: Add fauna that are native to the ecosystem, from birds and mammals to insects and reptiles, portraying them in their natural activities.
- Layering the Ecosystem: Show the different layers of the forest, from the canopy to the forest floor, to give depth and detail to your drawing.
- Seasonal Changes: Consider depicting the ecosystem in different seasons to highlight changes in flora and fauna.
- Environmental Interactions: Illustrate interactions between species, such as pollination or predation, to convey the dynamic nature of the ecosystem.
Incorporating biodiversity into your forest drawings not only enriches your artwork but also educates viewers about the complexity and beauty of forest ecosystems. By doing so, you contribute to raising awareness about the importance of conserving these vital habitats.
Illustrating the Layers of a Forest Ecosystem
Forest ecosystems are structured in layers, each with its unique characteristics and inhabitants. Illustrating these layers accurately can add depth and realism to your forest drawings. Here"s how to depict each layer:
- Canopy Layer: This is the top layer formed by the tallest trees. Draw the overlapping crowns of trees to represent the dense, leafy roof that absorbs most of the sunlight.
- Understory Layer: Below the canopy, this layer consists of smaller trees and young saplings. Use lighter strokes to illustrate these plants, which thrive in the dappled light.
- Shrub Layer: This includes bushes and shrubs. Draw these at a smaller scale, with varied textures to differentiate them from the understory and ground layer vegetation.
- Forest Floor: The bottom layer, rich in decomposing matter and home to numerous small organisms. Use dark, rich tones to represent the soil, fallen leaves, and decomposing logs.
Remember to incorporate various flora and fauna native to the forest type you are illustrating. This will not only make your drawing more accurate but also more engaging and educational for viewers. Capturing the essence of each layer helps to convey the complexity and beauty of forest ecosystems.

Techniques for Depicting Light and Shadow in Forest Scenes
Light and shadow play critical roles in bringing forest scenes to life in drawings. These elements add depth, mood, and realism. Here are techniques to effectively depict light and shadow in your forest ecosystem drawings:
- Observe Natural Light: Study how light behaves in real forests. Notice how it filters through the canopy and casts shadows on the ground.
- Use Light to Define Time of Day: The angle and color of light can indicate the time of day. Warm, golden light suggests morning or late afternoon, while a cooler, bluish tone can depict twilight or overcast conditions.
- Highlight the Canopy Layers: Depict the light filtering through the canopy and understory. Use lighter tones to represent areas where light penetrates and darker tones for shadowed areas.
- Create Depth with Shadows: Use shadows to add depth to your scene. Darker areas should be closer or beneath foliage, while lighter areas are exposed to the sky.
- Vary Your Techniques: Experiment with different drawing techniques like hatching, cross-hatching, and stippling to simulate the textures of light and shadow.
- Consider the Source of Light: Always keep the light source consistent in your drawing. This will help you determine where to place highlights and shadows.
- Use Contrast: Strong contrasts between light and dark areas can draw attention to focal points in your drawing, such as a particular tree or a clearing in the forest.
Mastering the depiction of light and shadow requires practice and observation, but it"s key to creating dynamic and engaging forest ecosystem drawings that resonate with viewers.
How to draw forest scene step by step - Art video
Get ready to unleash your creativity as you dive into the mesmerizing world of drawing! This video will take you on an artistic journey, teaching you a variety of techniques and tips to create stunning masterpieces. Whether you\'re a beginner or an experienced artist, prepare to be inspired and captivated by the magic of drawing!
Forest scenery drawing step by step - Wildlife drawing easy - Forest scenery drawing with animals
Embark on a thrilling adventure into the wild with this captivating wildlife video! Discover the beauty and majesty of nature\'s most incredible creatures as you witness them in their natural habitats. From fierce predators to gentle giants, this video will leave you in awe of the wonders that the animal kingdom has to offer. Get ready to be amazed and gain a whole new appreciation for the diverse wildlife that surrounds us.
Adding Wildlife to Your Forest Ecosystem Drawings
Wildlife is a vital component of forest ecosystems, bringing the scene to life with movement and character. Here’s how to incorporate animals into your forest drawings:
- Research Forest Wildlife: Understand which animals are typical of the forest ecosystem you"re drawing. Consider including a variety of species, from birds to mammals and insects.
- Consider Scale and Proportion: Pay attention to the size of animals relative to trees and other forest elements. This helps maintain the realism of your drawing.
- Positioning Animals: Place animals in natural positions, such as birds on branches, deer grazing, or squirrels climbing trees. Think about how they interact with their environment.
- Showing Movement: Suggest movement by drawing animals in various poses, such as flying, running, or foraging, to add dynamism to your drawing.
- Detailing: Add details to the animals such as fur texture, markings, and features to make them recognizable and lifelike.
- Use of Shadows: Apply shadows under animals to ground them in the scene and enhance the three-dimensional effect.
- Integrating into the Ecosystem: Ensure that animals are integrated into the drawing in a way that reflects their role in the ecosystem, highlighting interactions with the flora and other fauna.
Including wildlife in your forest ecosystem drawings not only makes them more engaging but also educates viewers about the biodiversity of these environments. It’s an excellent way to showcase the interconnectedness of life within forest ecosystems.
Environmental Messages through Art: Highlighting Conservation
Art has the power to communicate complex environmental messages in an accessible and impactful way. Drawing forest ecosystems with a focus on conservation can inspire awareness and action towards preserving our natural world. Here are steps to imbue your artwork with strong conservation messages:
- Choose Meaningful Subjects: Select scenes that showcase the beauty of forests and the threats they face, such as deforestation, climate change, or loss of biodiversity.
- Depict the Impact of Human Activities: Illustrate how human actions impact forests, highlighting both the negative effects and the potential for positive change through conservation efforts.
- Include Endangered Species: Draw attention to endangered species within forest ecosystems, emphasizing the need for their protection.
- Showcase Conservation Successes: Portray areas where conservation has made a positive impact, inspiring hope and encouraging further action.
- Use Symbolism: Employ symbols that represent growth, hope, or destruction to convey deeper messages about forest conservation.
- Encourage Viewer Engagement: Create interactive elements or informative captions that encourage viewers to learn more and get involved in conservation efforts.
Through your art, you can advocate for the importance of forest ecosystems and the urgent need for conservation. By highlighting the intricate beauty and vital importance of these environments, your drawings can contribute to a greater awareness and a more sustainable future for our planet.
Materials and Tools for Drawing Forest Ecosystems
Creating detailed forest ecosystem drawings requires a variety of materials and tools. Here’s a list to get you started:
- Pencils: A range of graphite pencils from hard (H) to soft (B) for different shades and textures.
- Colored Pencils: High-quality colored pencils can help bring your forest drawings to life with vibrant colors.
- Charcoal: Use charcoal for dramatic effects and deep shadows in monochromatic sketches.
- Ink Pens: Fine tip ink pens are great for outlining and adding sharp details.
- Watercolors: Watercolor can add a soft touch of color and depth to your drawings, ideal for backgrounds or subtle color variations.
- Brushes: A selection of brushes for watercolor painting, including both large wash brushes and fine detail brushes.
- Eraser: A kneaded eraser is versatile and can be shaped to remove graphite or charcoal without damaging the paper.
- Paper: High-quality, thick drawing paper or watercolor paper depending on your medium of choice.
- Blending Stumps and Tissues: For smoothing and blending pencil or charcoal work to create gradients and soft textures.
Experimenting with these materials can help you find your unique style and approach to drawing forest ecosystems. Whether you prefer detailed graphite drawings, vibrant colored pencil work, or the fluidity of watercolors, the right tools can make all the difference in bringing your artistic vision to life.
READ MORE:
Sharing Your Artwork: Platforms and Communities
Once you"ve created your forest ecosystem drawings, sharing your artwork can connect you with like-minded individuals and communities. Here are popular platforms and communities for sharing your art:
- Social Media: Platforms like Instagram, Facebook, and Twitter are great for sharing images of your artwork, connecting with other artists, and engaging with a broader audience.
- Art Communities: Websites like DeviantArt, ArtStation, and Behance offer dedicated spaces for artists to showcase their portfolios and discover other creators.
- Online Forums: Join forums such as Reddit’s r/Art or digital art communities where you can share your work, get feedback, and participate in challenges.
- Personal Website or Blog: Creating your own website or blog can be a professional way to display your artwork, tell the story behind your creations, and sell your art.
- Exhibitions and Art Shows: Participate in local art exhibitions, shows, or community events to showcase your work in a physical setting.
When sharing your art, engage with your audience by telling the story behind your drawings, the inspiration you drew from forest ecosystems, and why conservation matters to you. This not only showcases your artistic talent but also spreads awareness about the importance of preserving natural habitats.
Embrace the journey of capturing the essence of forest ecosystems through drawing, a powerful way to connect with nature and advocate for its conservation. Share your art, inspire others, and contribute to a greener future.